Step-by-step
-
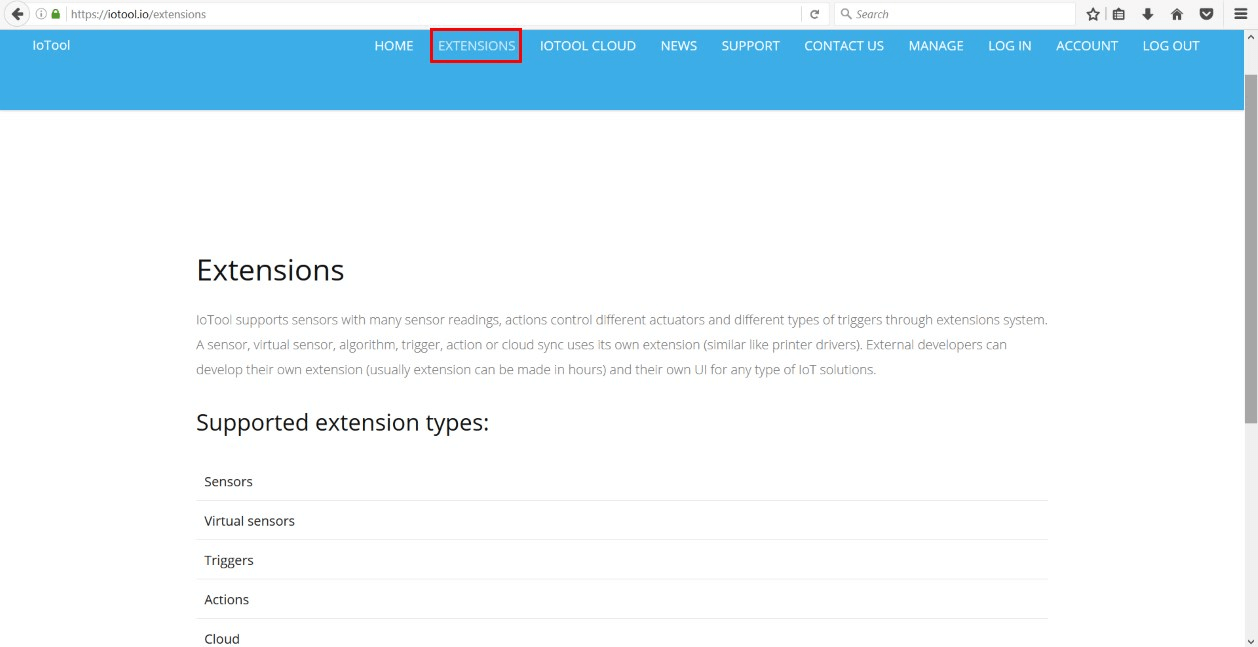
About IoTool
IoTool, a multi-awards winning smartphone gateway and API allows IoT researching and fast prototyping with minimal costs.
Currently IoTool supports more than 100 different sensors with more than 250 sensor readings, 50 actuators (like Arduino, Lifx and similar) and different types of triggers connected to ordinary smartphone through a very flexible extensions system. Any new sensor, action, actuator, algorithm, trigger or cloud sync uses its own extension (similar like printer drivers). External developers can develop their own extension (usually extension can be made in hours) and their own UI for any type of IoT solutions.
IoTool works on Android devices (phone, tablet, Android TV, Raspberry PI with Android OS installed). IoTool on smartphone can process (collect, encrypt, store, show values and diagrams, sync to Cloud) up to 24.000 records per second, for example 12 lead ECG with 2000Hz.
-
IoTool installation
- Register and Login to IoTool.io
- Select extensions needed for a project

- Download IoTool.apk (link is on iotool.io main page)
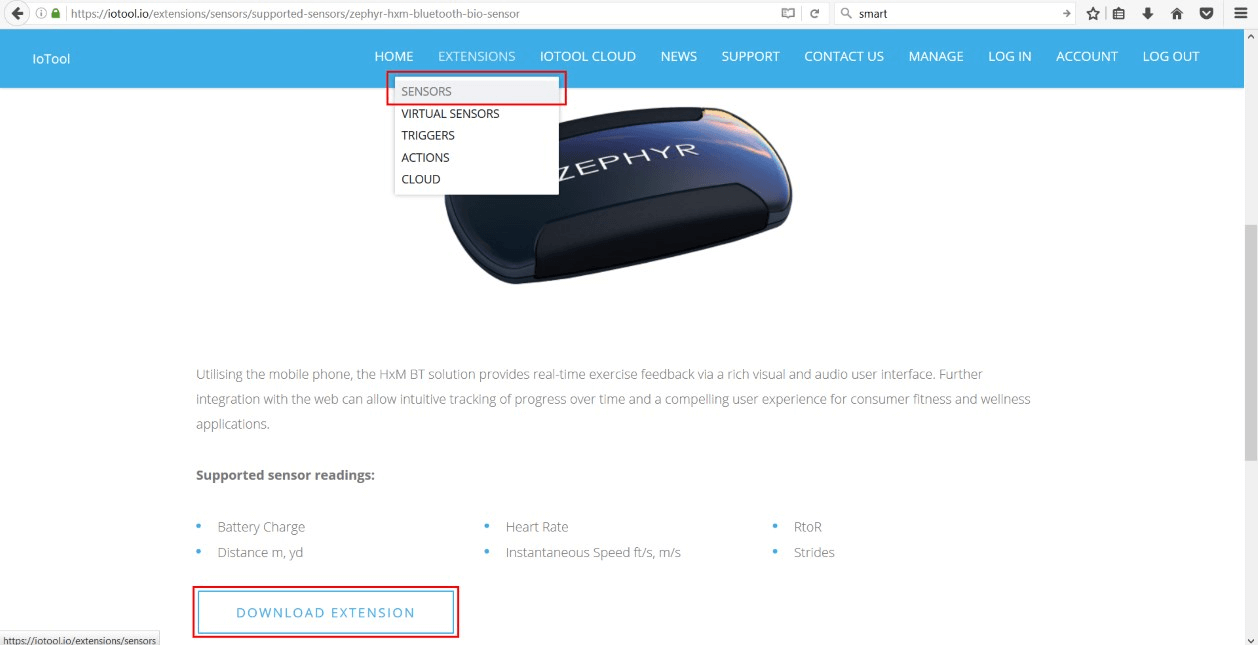
- Select and download sensor extensions (iotool.io / EXTENSIONS / SENSORS) to your smartphone. If you wish to use only internal Android sensors, use “Android sensors – Service: Device internal”.
-
IoTool setup and test
- Read the User manual (iotool.io / SUPPORT / USER MANUALS / IoTool User manual) and setup sensors and IoTool dashboard to get wished Sensor readings.
- NOTE: all selected Sensor readings from IoTool dashboard will be sent to IBM Watson.
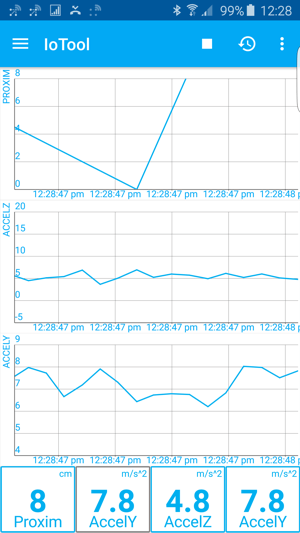
- After dashboard START is pressed, you should get all selected Sensor readings to the IoTool dashboard in real-time.
-
Setting up your Bluemix IoT service
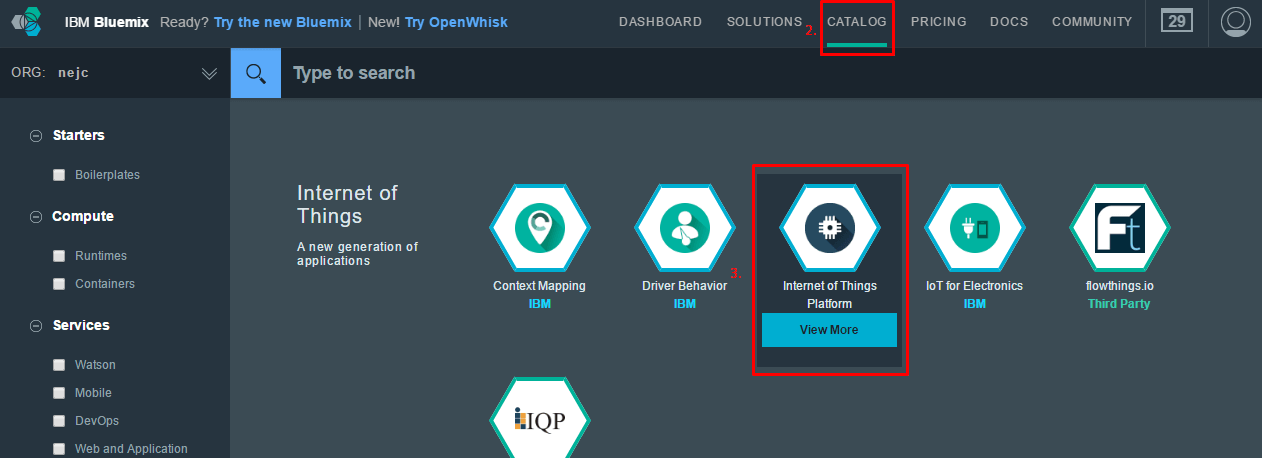
- Login into your Bluemix account.
- In the top menu select catalog.
- Find service named “Internet of Things Platform” and click on it.
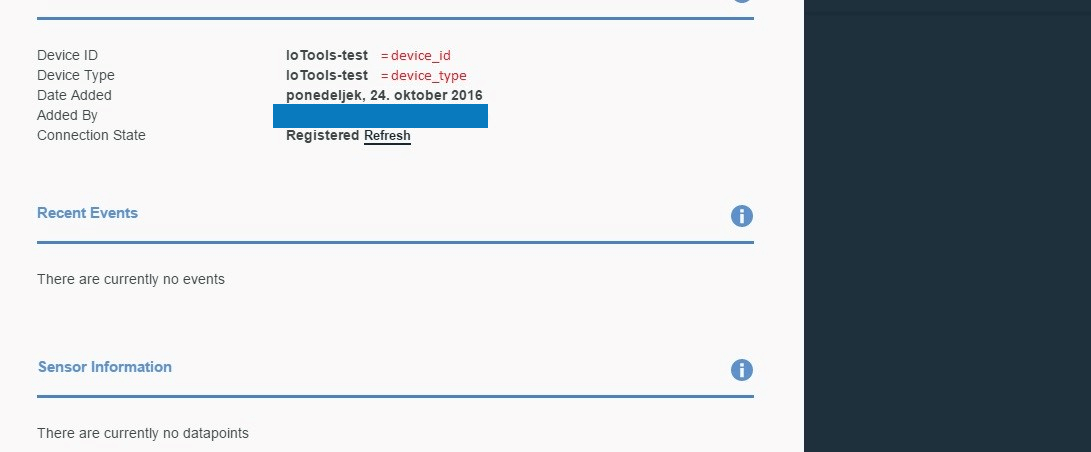
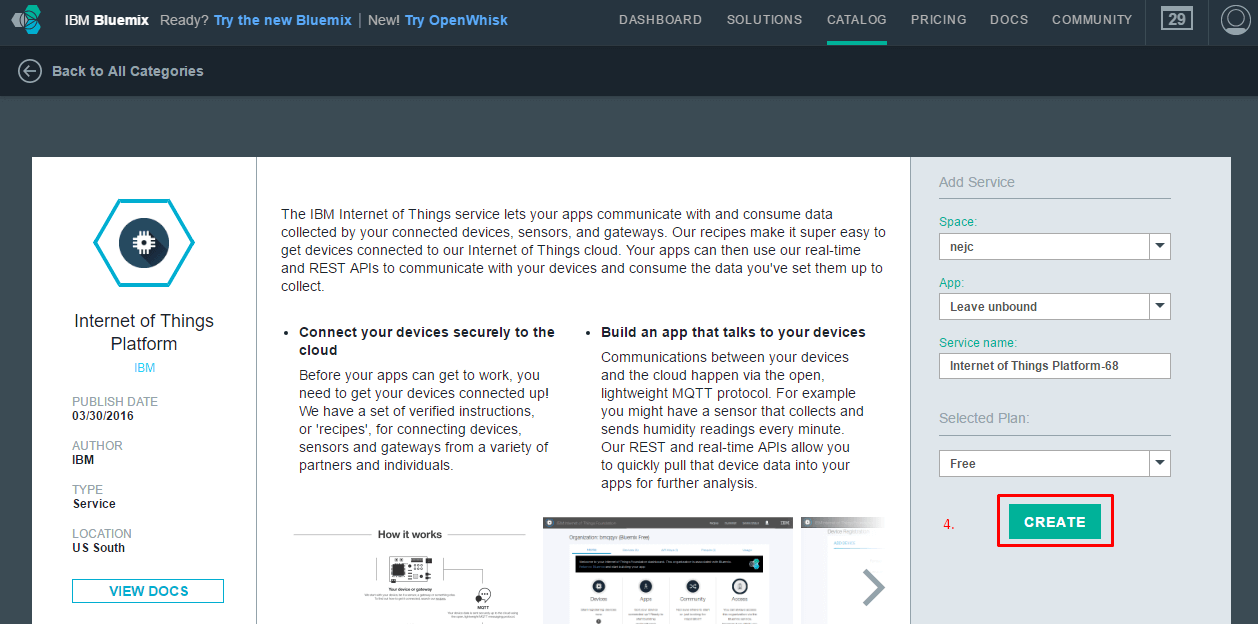
- Name your service, click create service and follow this recipe to register your device in IBM Watson IoT Platform.
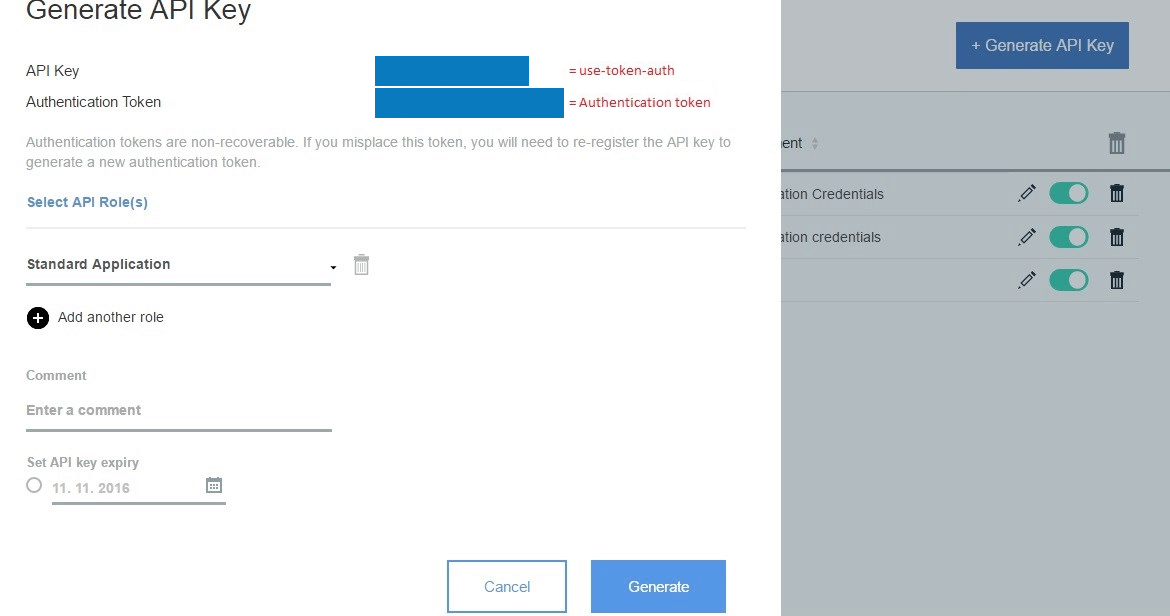
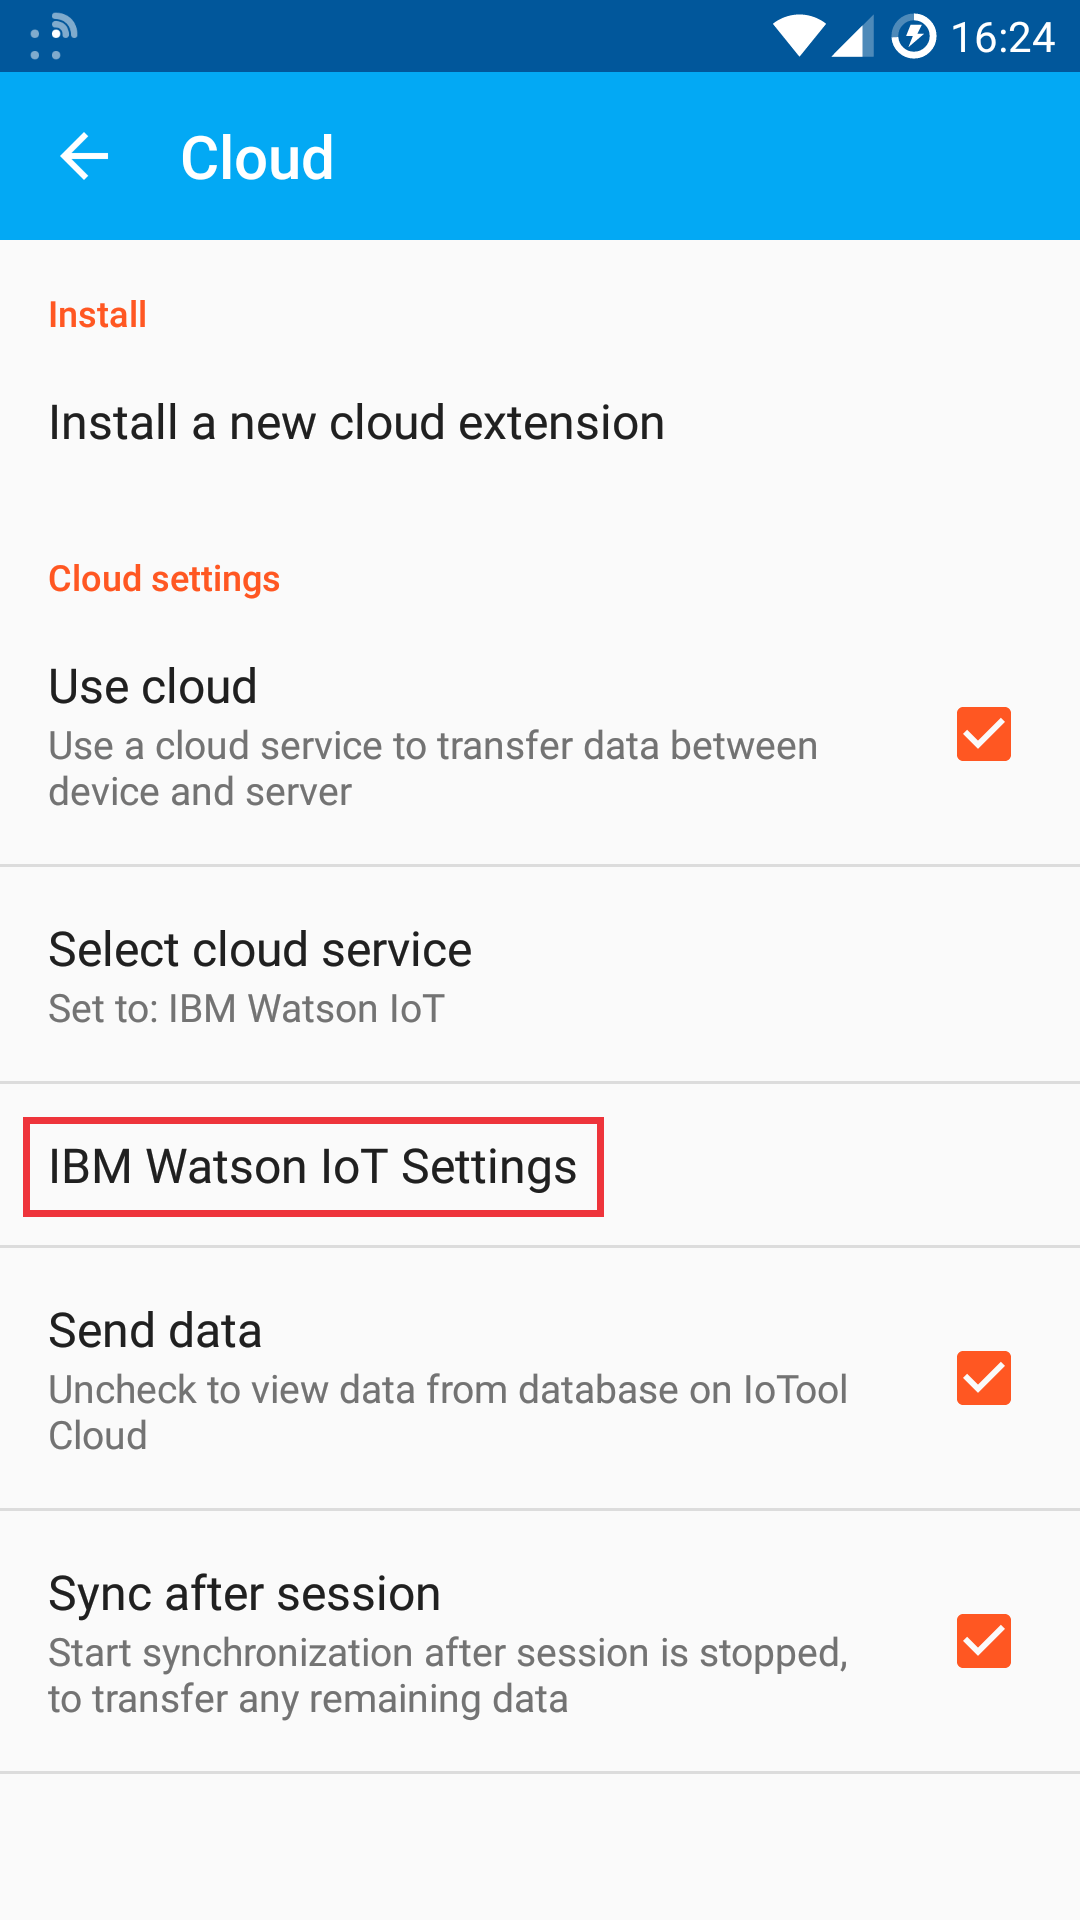
- Note down the connection parameters.
Example: my connection parameters
- Hostname: ssl://jlhg2r.messaging.internetofthings.ibmcloud.com
- Username: use-token-auth
- Password: *************
- Client identification: d:jlhg2r:Android:frogec
- Topic: iot-2/evt/accel/fmt/json
- Port: 8883
-
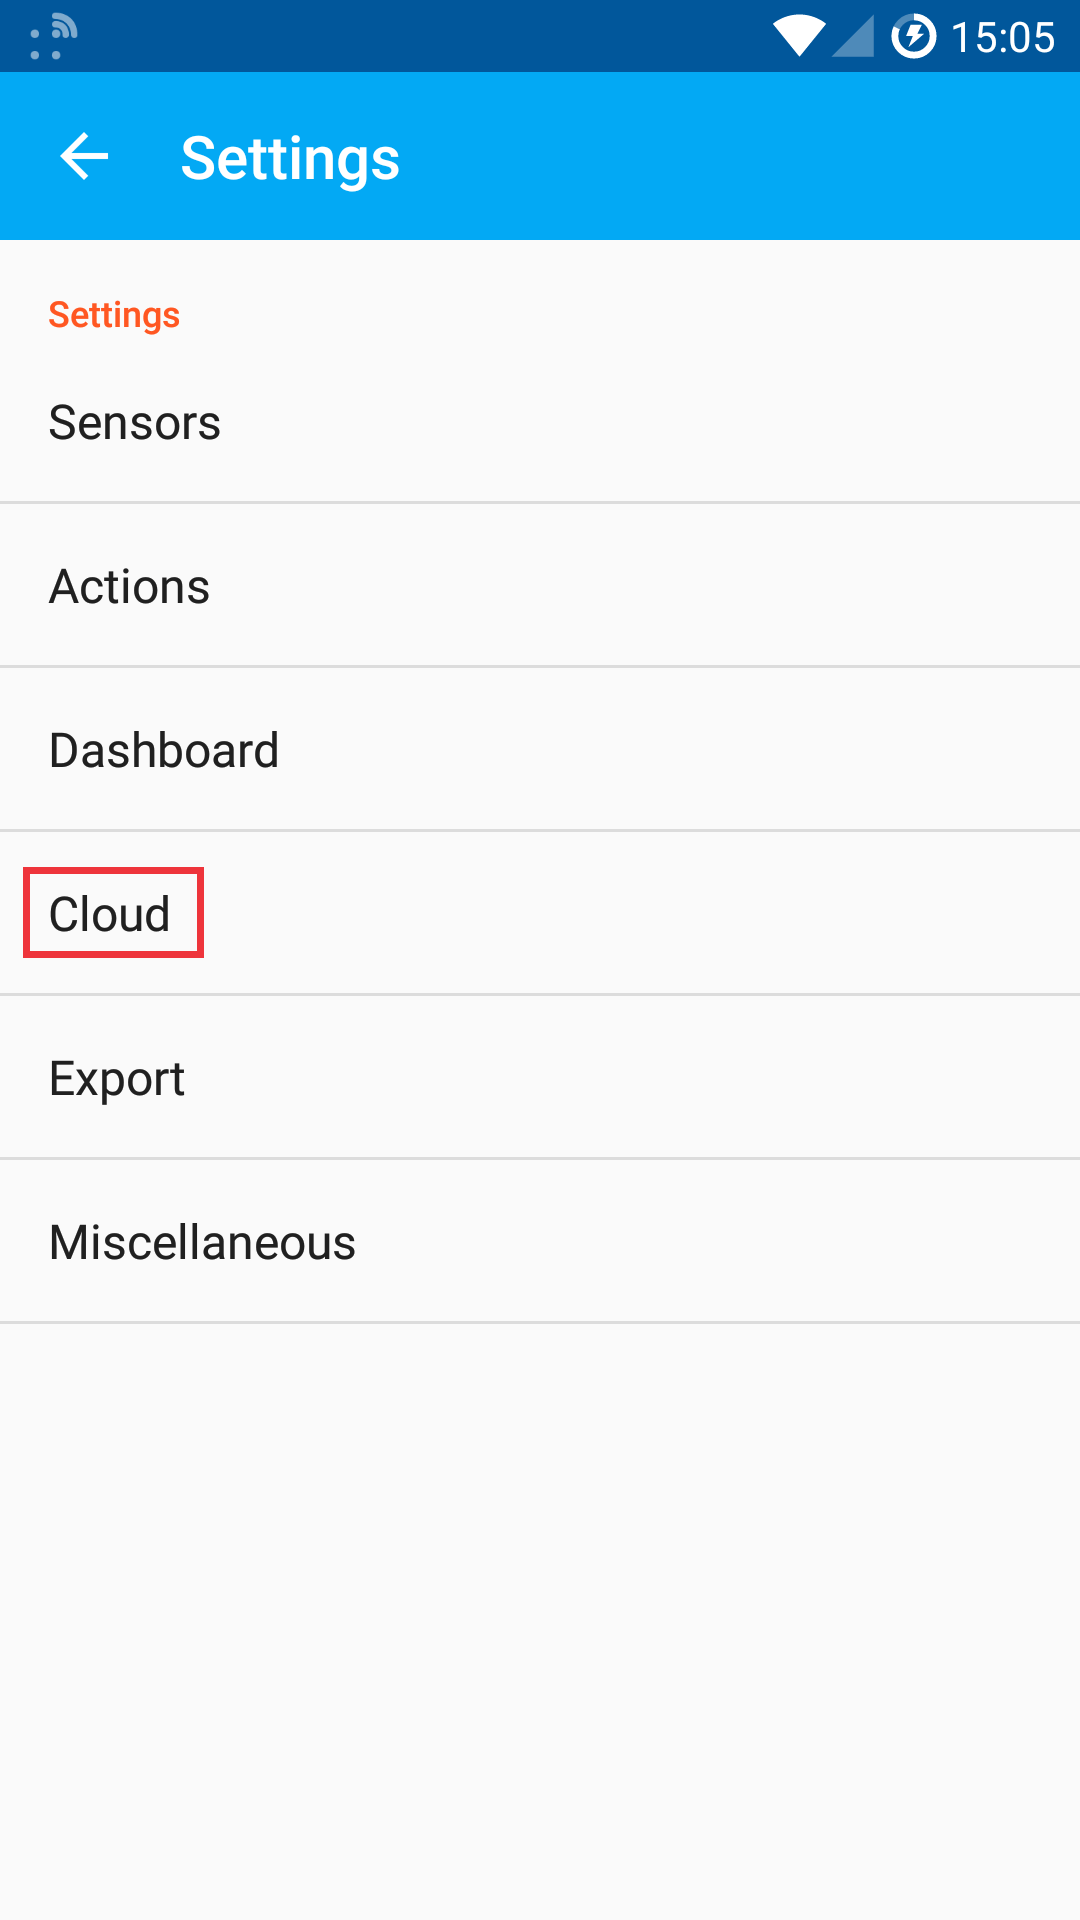
IoTool IBM Watson IoT Cloud extension download and synchronization settings
- Download IoTool IBM Watson IoT Cloud extension: iotool.io / EXTENSIONS / CLOUD / IBM Watson IoT Cloudto your smartphone.
Iotool Synchonization settings
In the later steps we will modify IoTool settings to match with IBM connection parameters for your device. You can find settings if you open navigation drawer in your IoTool app -> Settings -> Synchronization-> IBM Watson IoT Settings. Note that in Synchronization settings both Use synchronization and Send data must be checked and IBM Watson Iot service selected.
Connection parameters
The following information is required when connecting your device:
- URL: org_id.messaging.internetofthings.ibmcloud.com
Where org_id is the ID of your Watson IoT Platform organization. - Port:1883
8883 (encrypted)
443 (websockets) - Device identifier: d:org_id:device_type:device_id
This combination of parameters uniquely identifies your device. - Username: use-token-auth
This value indicates that you are using token authorization. - Password: Authentication token
This value is the unique token that you defined or that was assigned to your device when you registered it. - Event topic format: iot-2/evt/event_id/fmt/format_string
Where the event_id specifies the event name that is shown in Watson IoT Platform, andformat_string is the format of the event, such as JSON. - Message format: JSON
Watson IoT Platform supports several formats, such as JSON and text.
You can read more about connecting devices here.
Path to settings
-
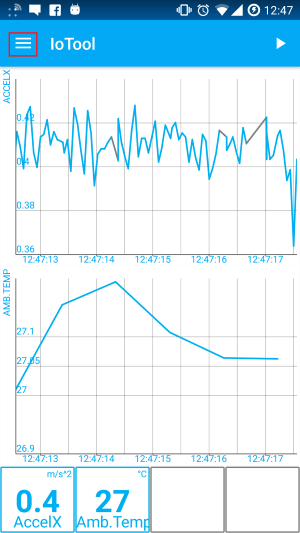
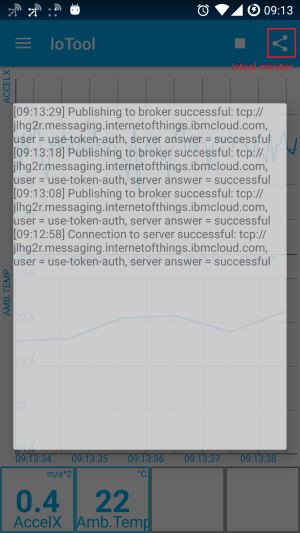
Start and test dashboard and communication
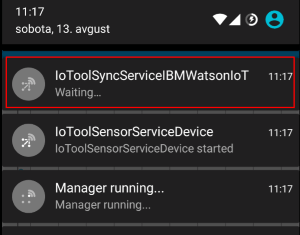
START a dashboard. To make sure that service is running, check your notification bar.
and IoTool monitor
Collected Sensors readings should be synced to IBM Watson.