- IoTool Blog
- Read 2659 times
Overview
Skill Level: Intermediate
Basic knowledge of Android development is recommended.
Step by step guide of how to connect your IoTool app to UnificationEngine. We will use this connection to publish events recorded by IoTool to the UnificationEngine platform.
Ingredients
- UnificationEngine
- Android device (API 18) with the latest IoTool app and sensor service.
Helpful sites for obtaining tokens
- Facebook: https://developers.facebook.com/tools/explorer
- Twitter: https://apps.twitter.com/
- Tumblr: https://www.tumblr.com/docs/en/api/v2
- Google+: https://developers.google.com/oauthplayground/
Step-by-step
-
Setting up your UnificationEngine service
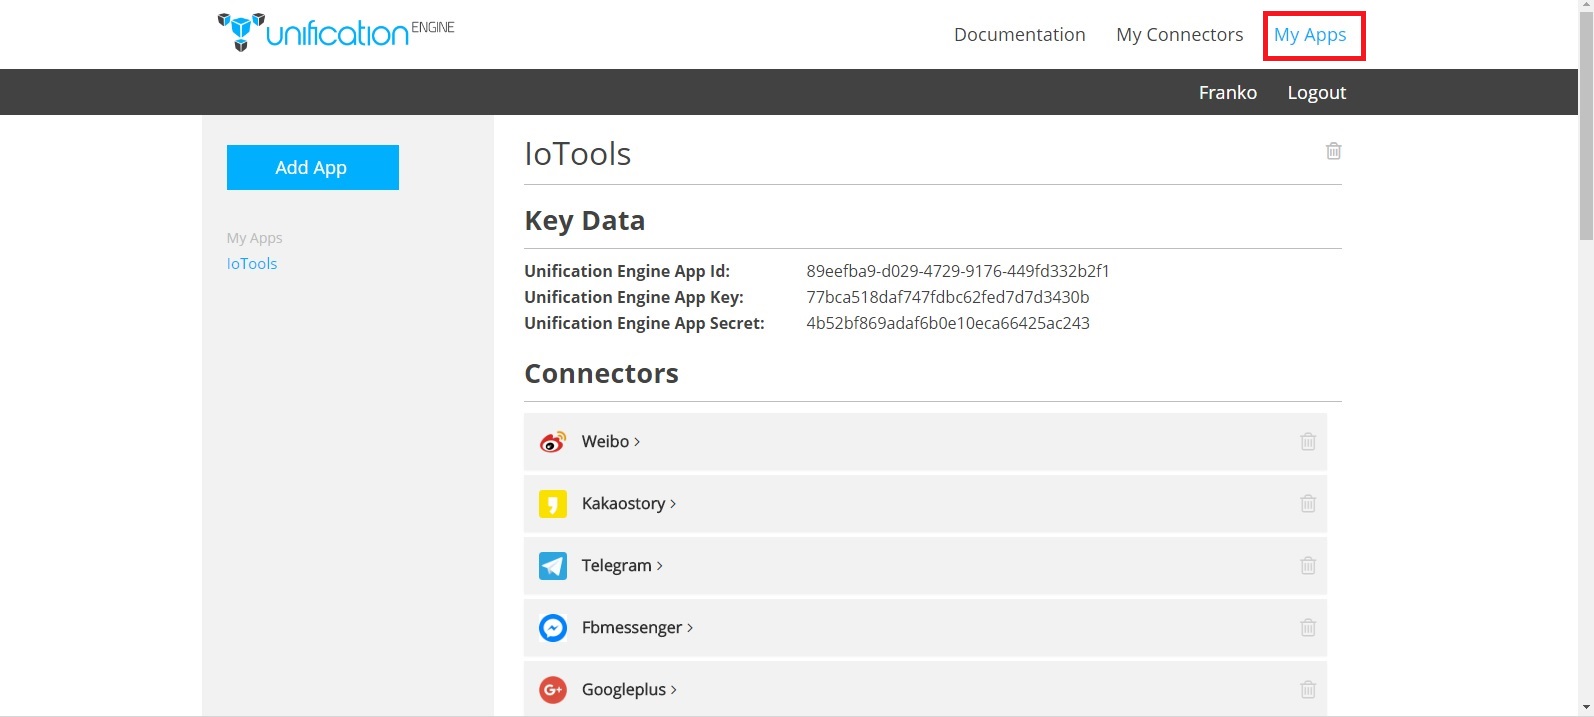
Before we can start, we need to set up a service. To do that, we need to add a new application and new connectors. Log in to your UnificationEngine account. Look for a button labeled "My apps", which is located in the top right corner of the screen and click it. You should be presented with the list of your currently existing apps. A button that allows you to add new apps is located on the left side of the screen. Simply click it and give your new app a name.
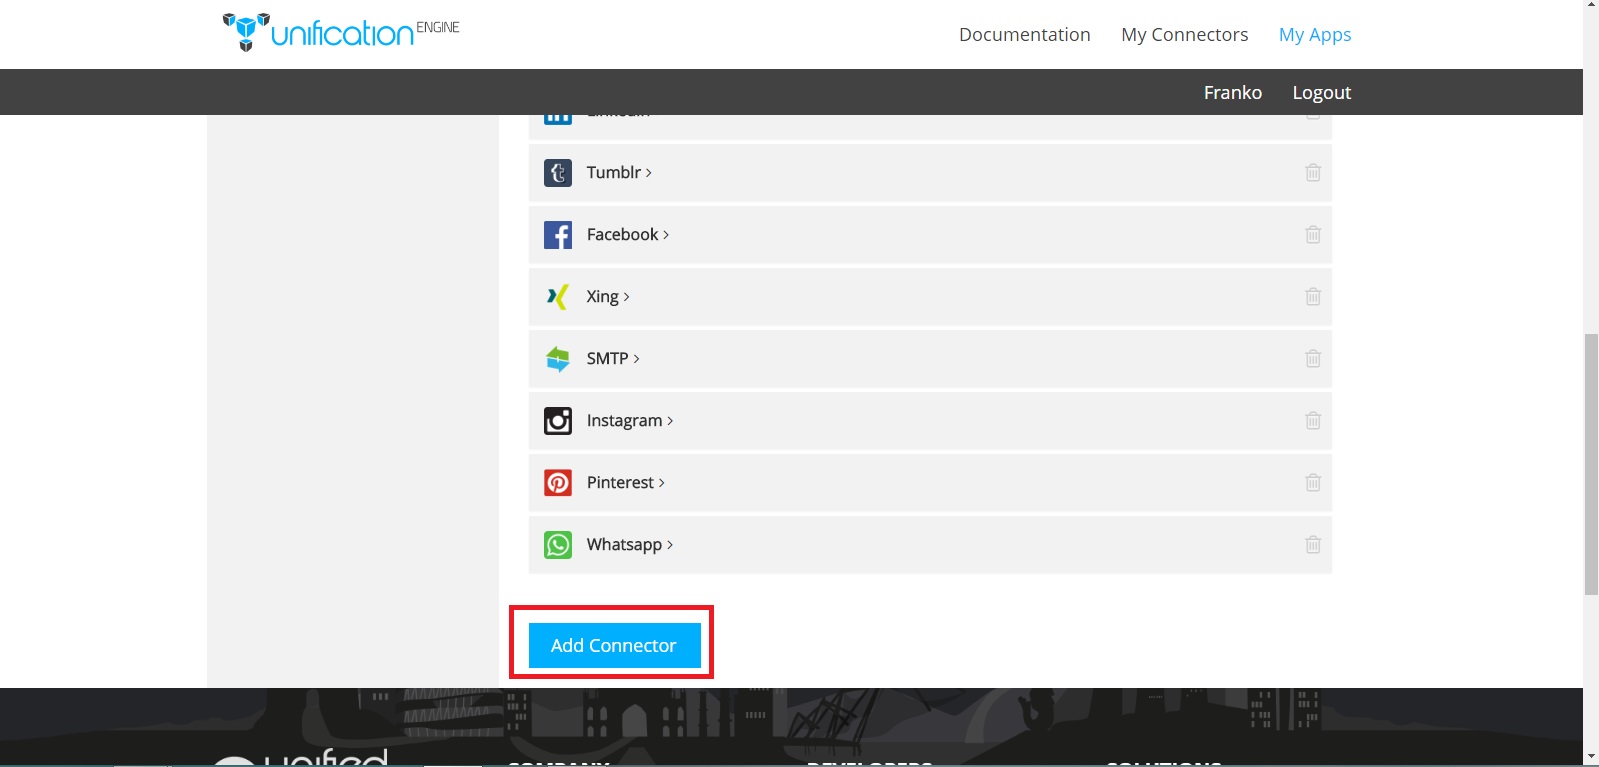
After that, we need to add a connector. On the left side of your screen choose your newly created app. Look for a button labeled "Add Connector". It is located below the list of current connectors. Choose where are you going to send your data. The connector API key and API secret should be provided by the third party if needed (Facebook, Tumblr, Twitter, etc.). Note that the API key and API secret can also be given under a different name (example: customer key, customer secret).

-
Choosing the synchronization service in IoTool
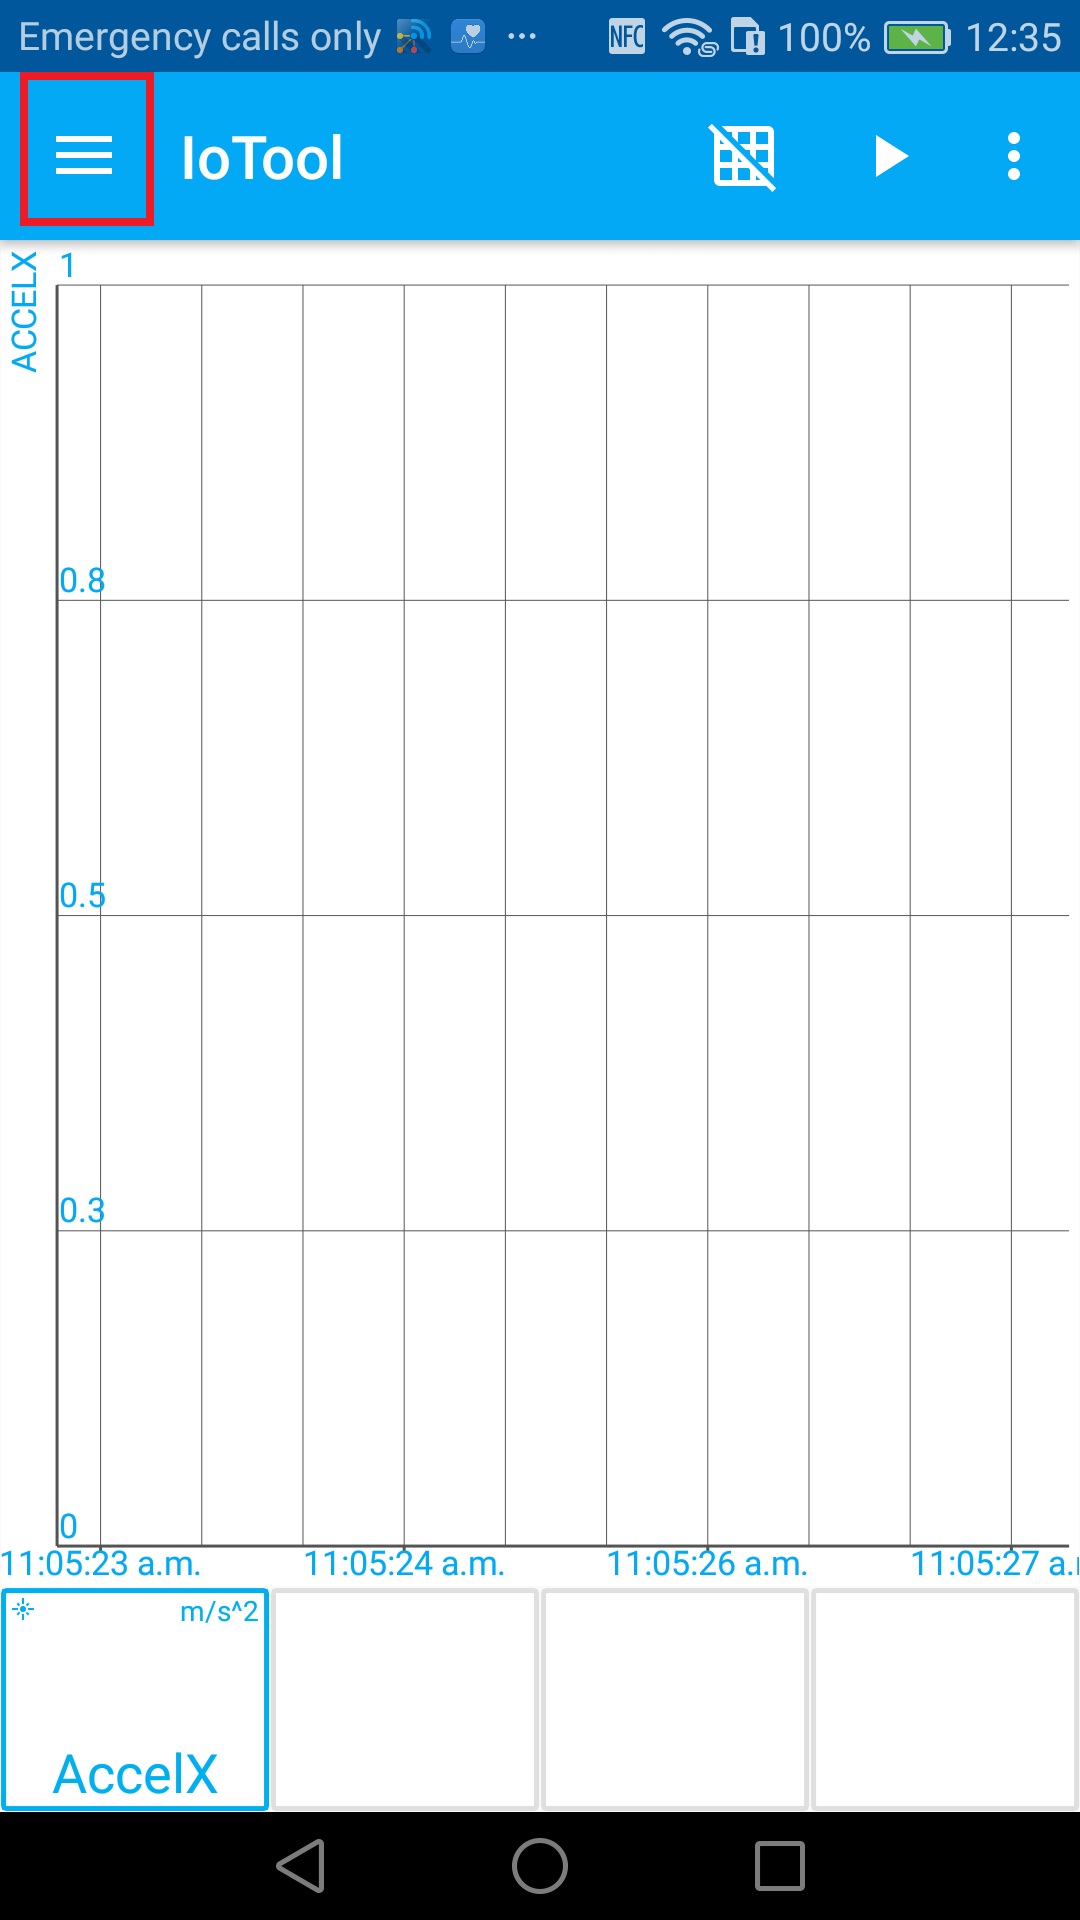
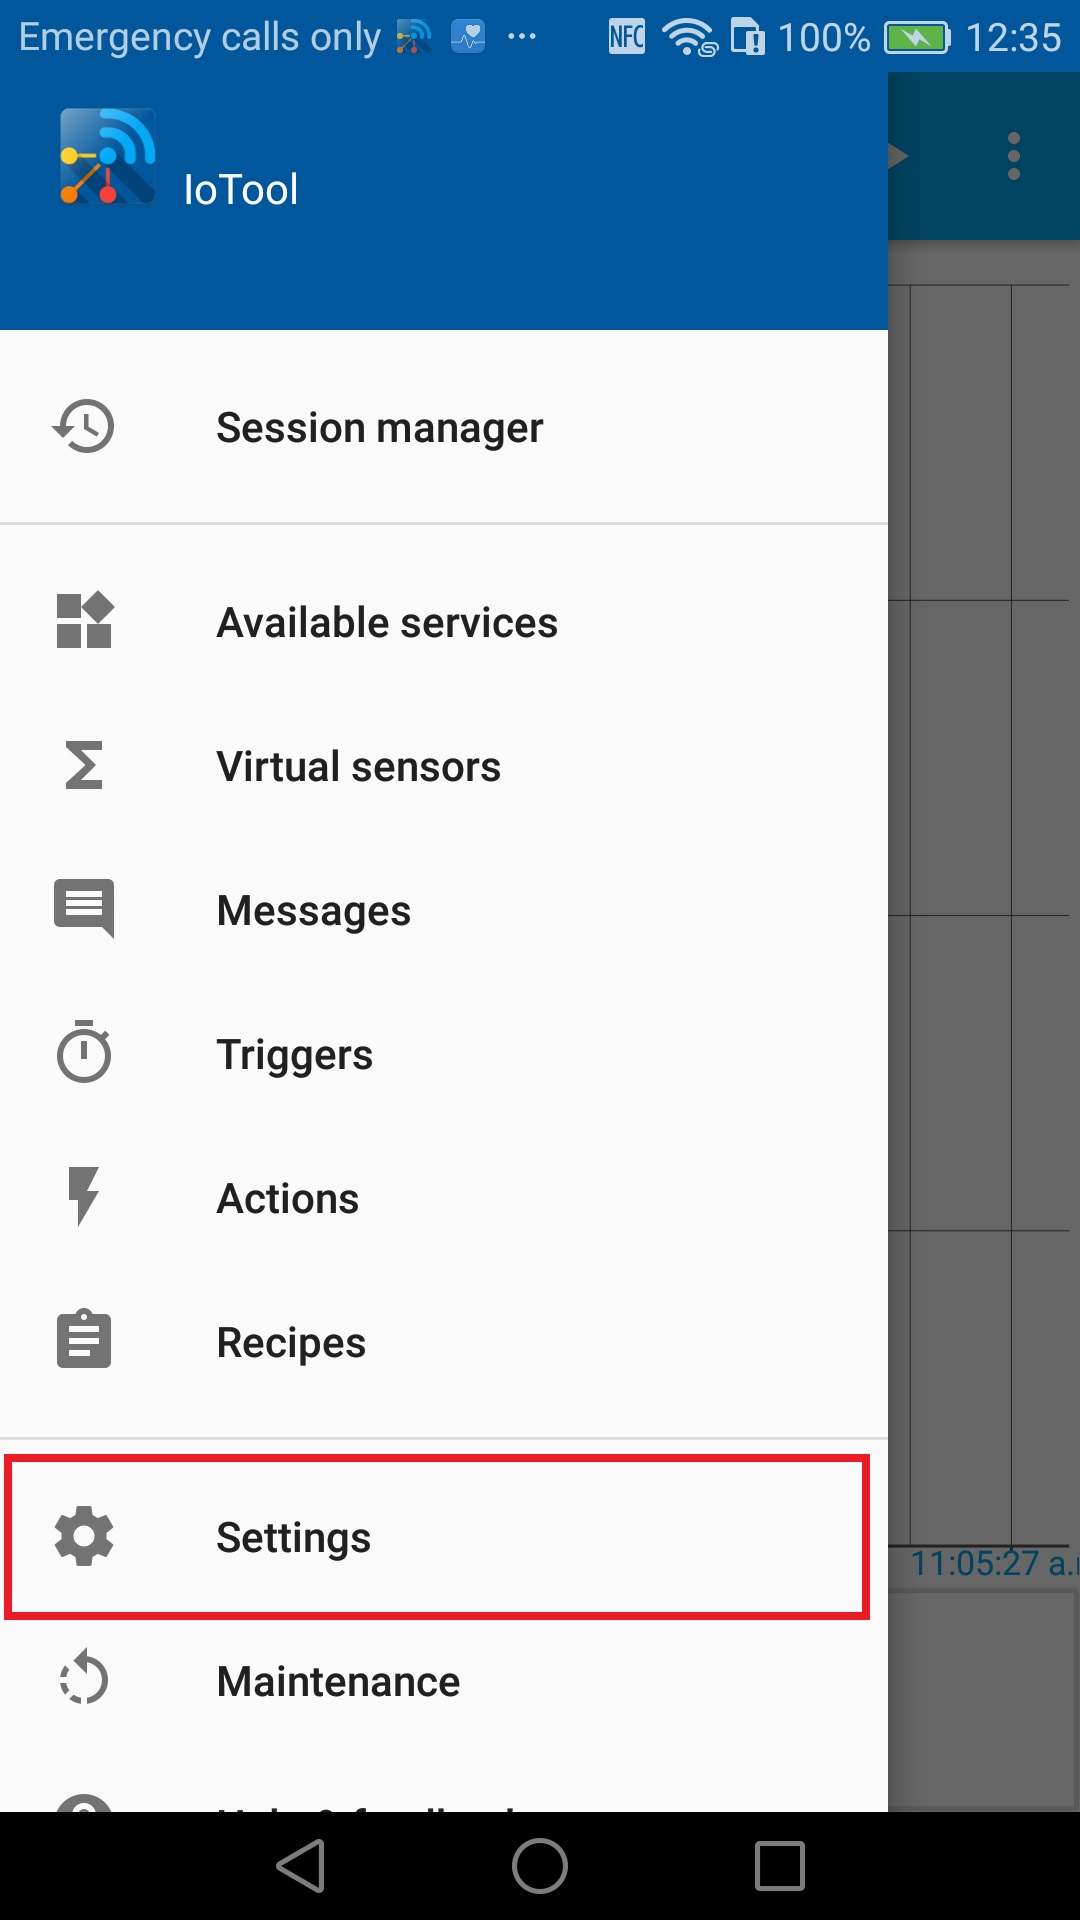
Now we will select a synchronization service in the IoTool app. To choose the correct service, you have to open a menu, by clicking the drawer icon
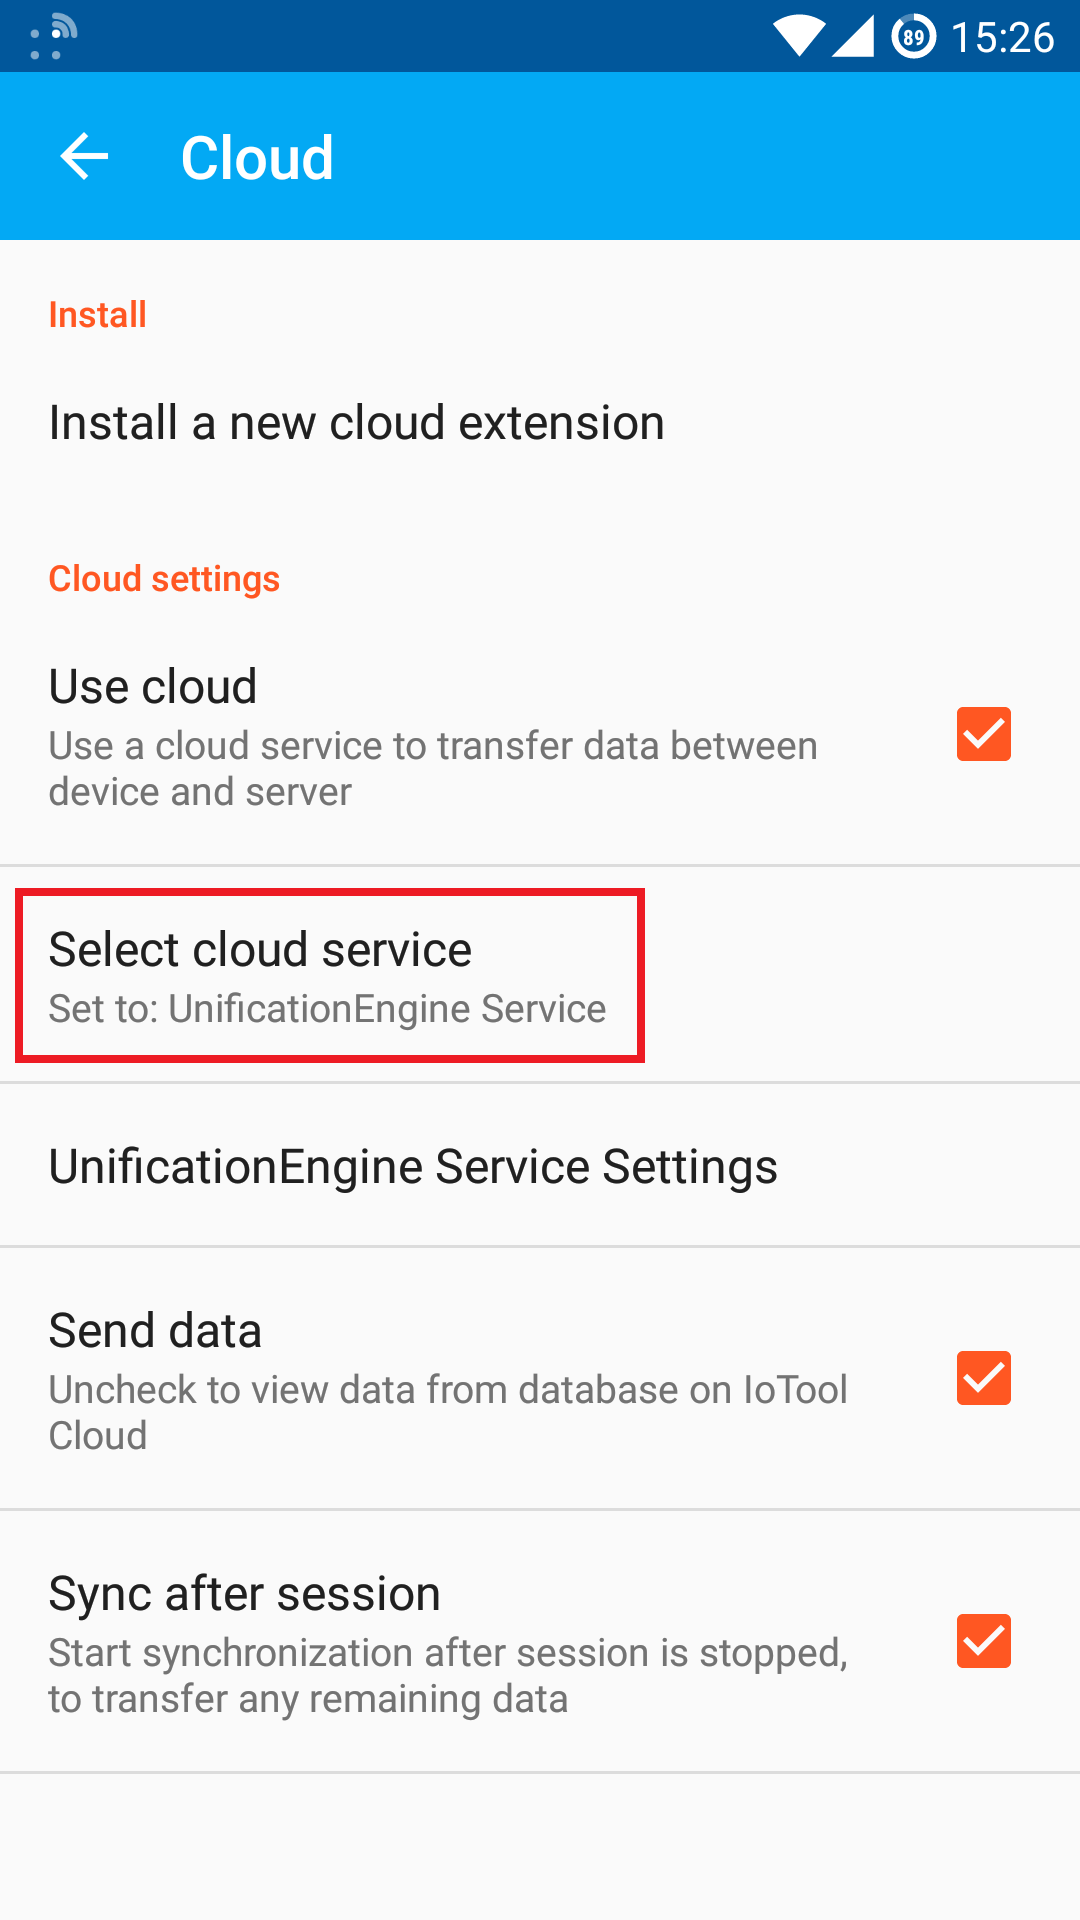
located in the top-left corner of the screen. Then navigate to "Settings" → "Synchronization" → "Select synchronization service". Select the "UnificationEngine service". Make sure that the synchronization settings are set like in the picture below. -
Configuring your IoTool application
Now we need to go to the settings of your application and configure the parameters for the connection. You will need to know the following parameters:
- API key
- API secret key
- Connector identifier (Where are you sending data)
- Access token
- Secret token
- Hostname (Third party hostname)
- Receiver (profile id, e-mail address or phone number)
- Sender (profile id, e-mail address or phone number)
- Parameters (additional parameters to send)
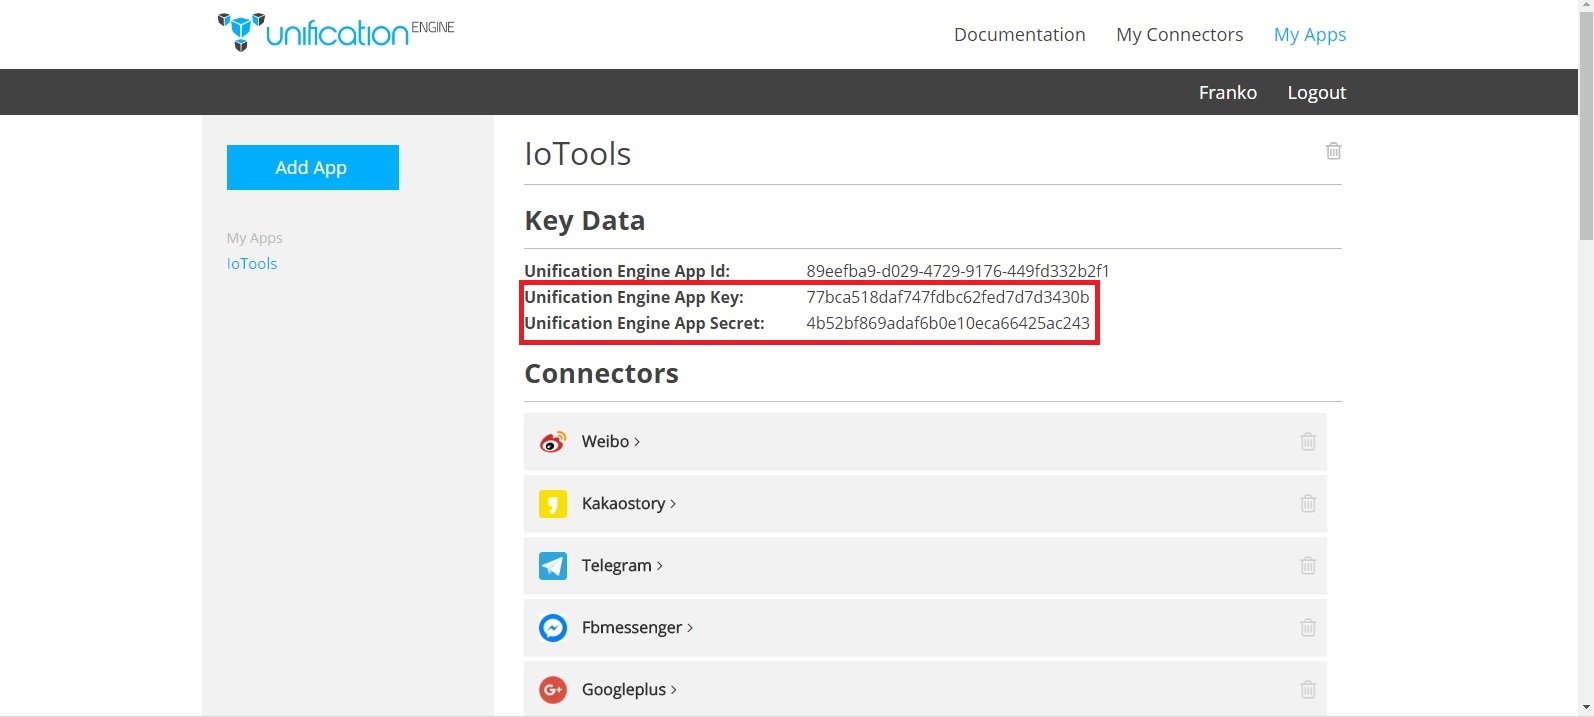
To get the API key and secret, click on "My apps" and then click on the chosen application. The details about the API should appear on the screen. Copy the API key and secret to your IoTool app settings. The access token is a series of random symbols. This can only be obtained after logging in into a third party account. Some companies provide easy access to those tokens with their developer accounts. The connector identifier determines where is the data going to be sent. Select your desired destination.
The receiver and sender parameters decide to who or from who the data is sent. It is used to send e-mail and SMS or to specify a user to send to. If you do not intend to take advantage of this feature, insert a random set of symbols. Parameters are used to send additional details to the cloud. They are important because they provide additional information for a specific connector, enabling it to work correctly. Each connector has its own set of additional parameters, but for the most part, they are not required. These parameters need to be ordered and separated by commas.
Before we continue, we need to take into consideration that specific connectors have different rules on which settings need to be empty and which need to be filled out. Below there is a table of different connectors and their specific configuration values.
Connector Token Secret Params Facebook yes no no Fbmessenger yes no no Googleplus yes no id, refresh_token and is_profile (is_profile is always false) Instagram yes no username and password Kakaostory yes no refresh_token Line yes no no Linkedin yes no id and is_profile (if is_profile contains user ID then its true otherwise false) Pinterest yes no id, is_profile and username (is_profile is always true)
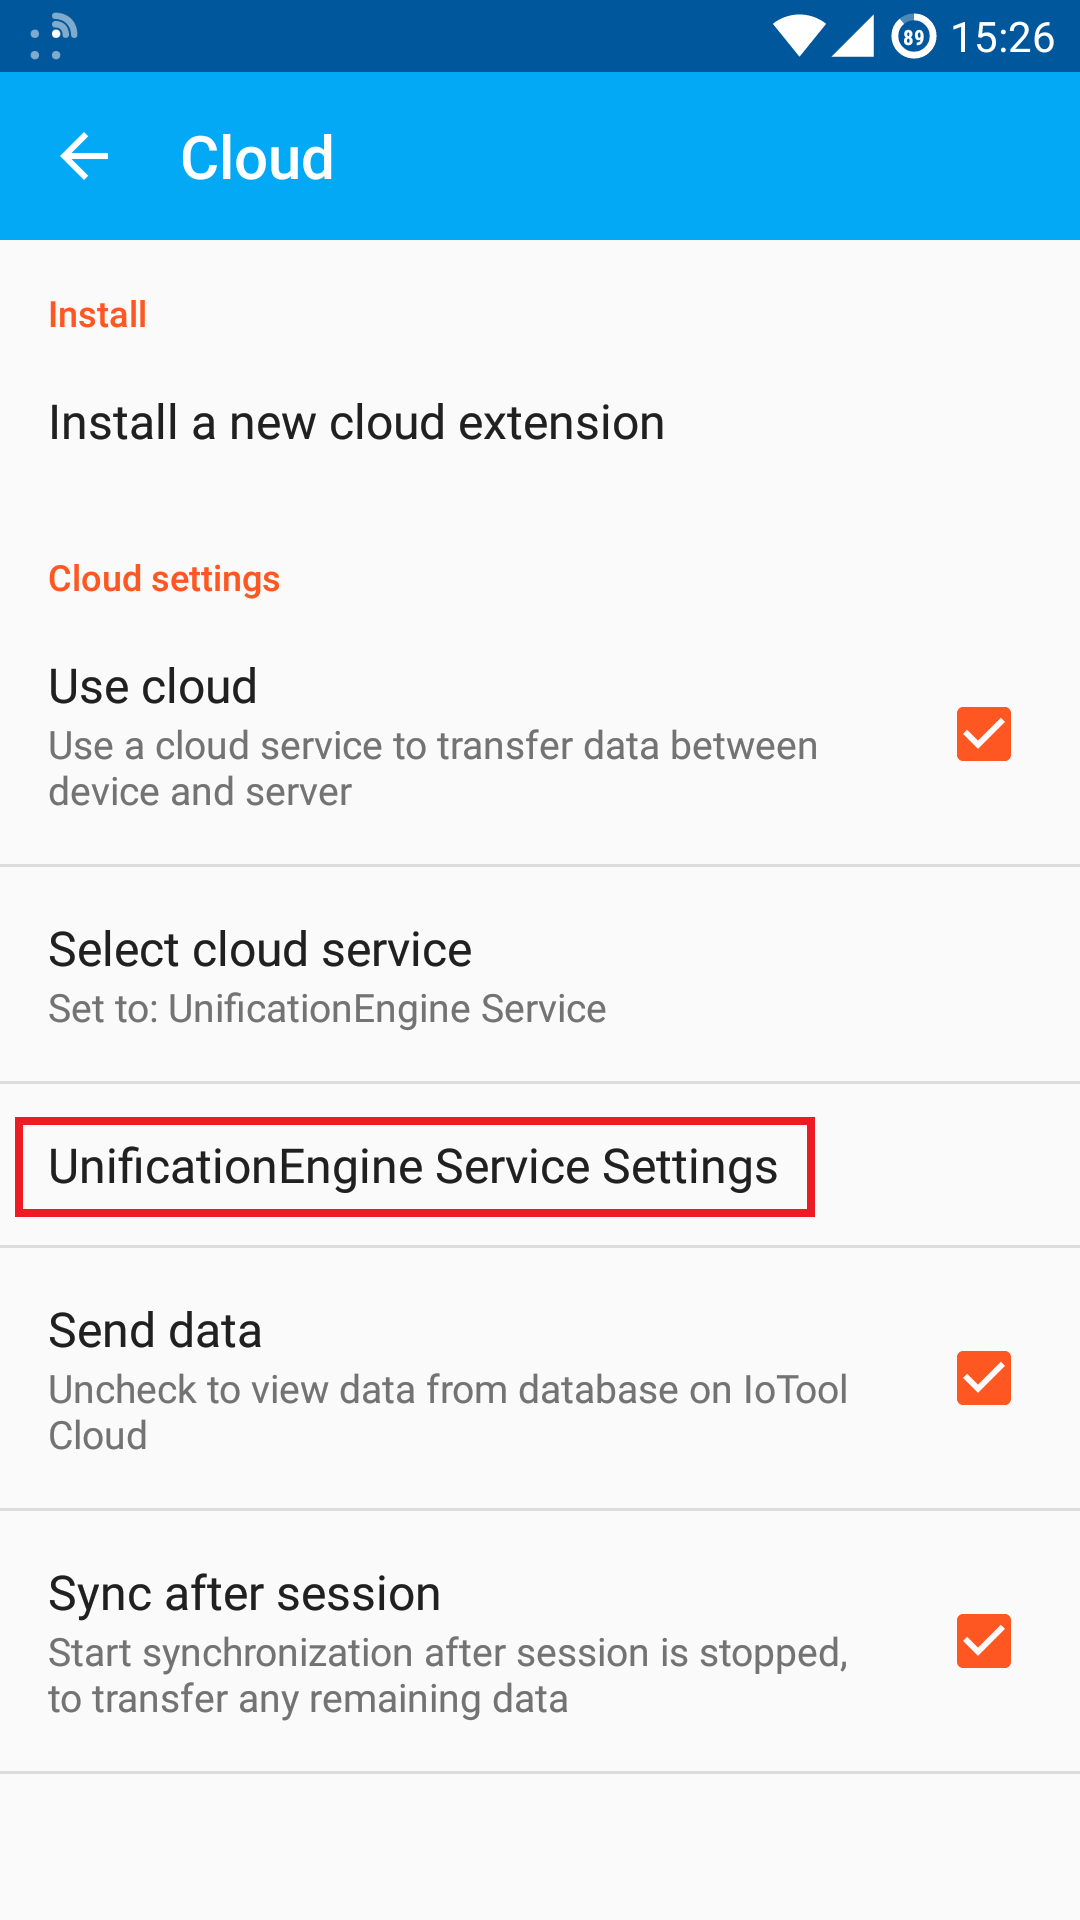
Sendgrid yes no no Skype yes no id (id = BOT_ID) SMS yes yes phone_number is phone number with country code Smtp no (EMAIL_ID:PASSWORD@HOST:PORT) no no Telegram yes no no Tumblr yes yes no Twitter yes yes no Viber yes (SERVICE_ID) no phone_number is phone number with country code Weibo yes no id and is_profile (is_profile is always true) Whatsapp yes (PHONE_NUMBER_WITH_COUNTRY_CODE) no no Xing yes yes no To open the UnificationEngine service settings tap the corresponding button.
Examples:
Tumblr:
- App key: "<appkey>"
- App secret key: "<secretkey>"
- Connector identifier: "Tumblr"
- Access token: "<tumblrAccessToken>"
- Secret token: "<tumblrSecretToken>"
- Hostname: "tumblr.com"
- Receiver: "frenk99999"
- Sender: "frenk99999"
- Parameters: ""
Google+:
- App key: "<appkey>"
- App secret key: "<secretkey>"
- Connector identifier: "Google +"
- Access token: "<googleAccessToken>"
- Secret token: ""
- Hostname: "plus.google.com"
- Receiver: "111838128181974458225"
- Sender: "111838128181974458225"
- Parameters: "111838128181974458225,<tokenRefresh>,false"
Twitter:
- App key: "<appkey>"
- App secret key: "<secretkey>"
- Connector identifier: "Twitter"
- Access token: "<twitterAccessToken>"
- Secret token: "<twitterSecretToken>"
- Hostname: "twitter.com"
- Receiver: "franksenlab"
- Sender: "frenksenlab"
- Parameters: ""
Note that the values denoted in <> are information that should not be public. They will have to be replaced with actual values.