This guide will show you how to prepare your Arduino and Android device to work with IoTool and its Android extension. To support your own Arduino sensors with IoTool check out our IoTool Arduino Library here.
Overview
Skill level: Intermediate
Basic knowledge of Arduino IDE is recommended. To add your own measurements some knowledge of coding on Arduinos (C++) is needed.
Ingredients
- Android device (version 4.1 and up) with the latest IoTool app with sensor reading extension.
- An Arduino device with a Bluetooth module (ex. HC-06) OR Arduino/Genuino 101 with integrated Bluetooth.
- A working Arduino IDE environment on you PC and your Arduino board set up.
Step by step
Prepare your Arduino
- Connect the Blutooth module to your Arduino. Follow the instructions provided by the manufacturer/online community. Make sure that RX is connected to pin 0 and TX to pin 1. If you are using Arduino/Genuino 101 just continue with step 2.
- Plug the Arduino into your PC via USB.
Prepare the Arduino environment
- Download the IoToolArduinoLibrary.zip file.
- Open the Arduino IDE and wait for it to load.
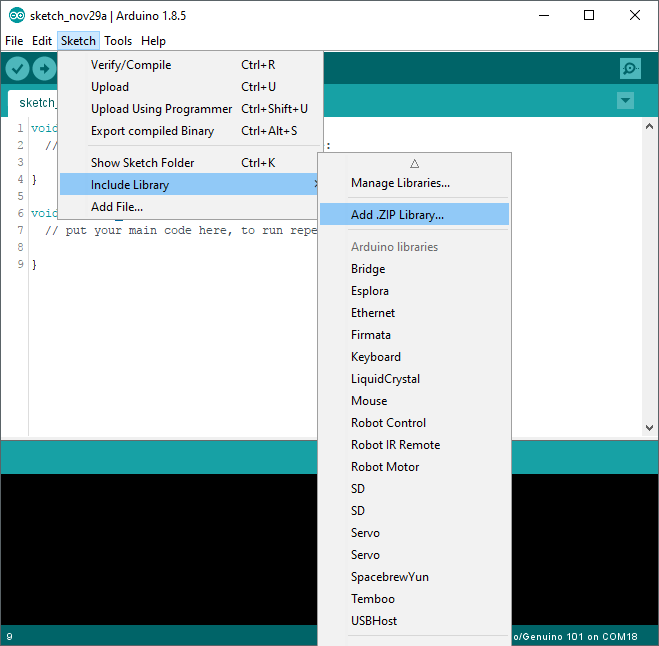
- Open the Sketch menu, select Include Library and Add .ZIP Library…

- Select the downloaded IoToolArduinoLibrary.zip file.
Upload one of our example sketches
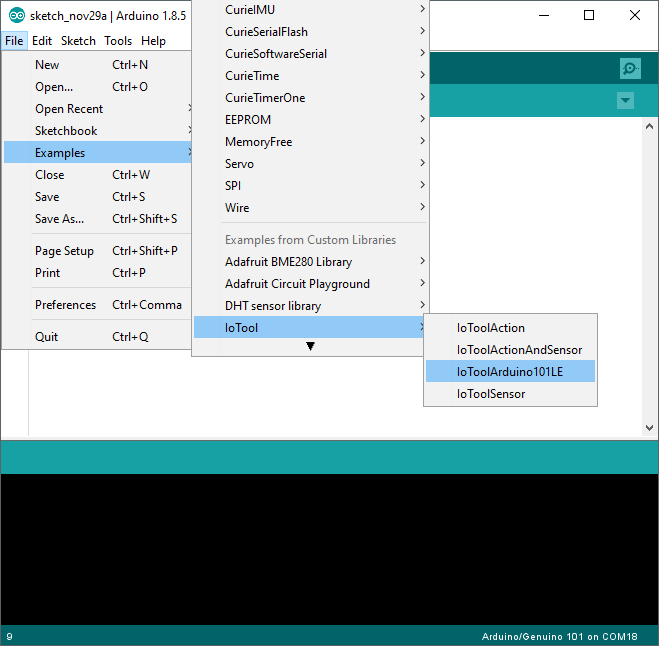
- Open the File menu in the Arduino IDE, select Examples, then find and select the entry IoTool. Pick the IoToolSensor example if or IoToolArduino101LE if you are using the Arduino/Genuino 101.
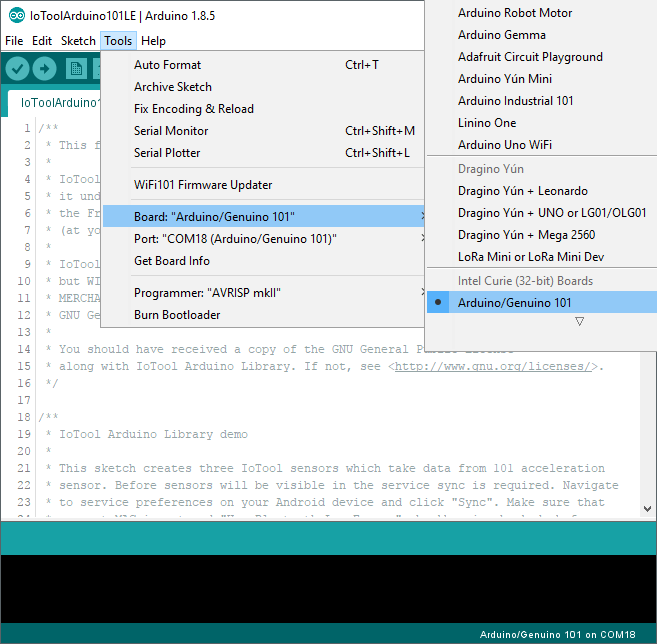
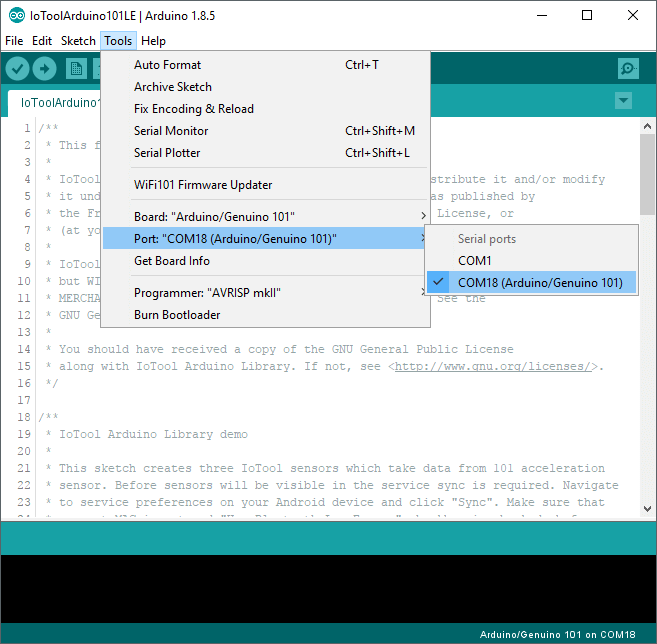
- Check that you have the correct board profile and communication port selected.
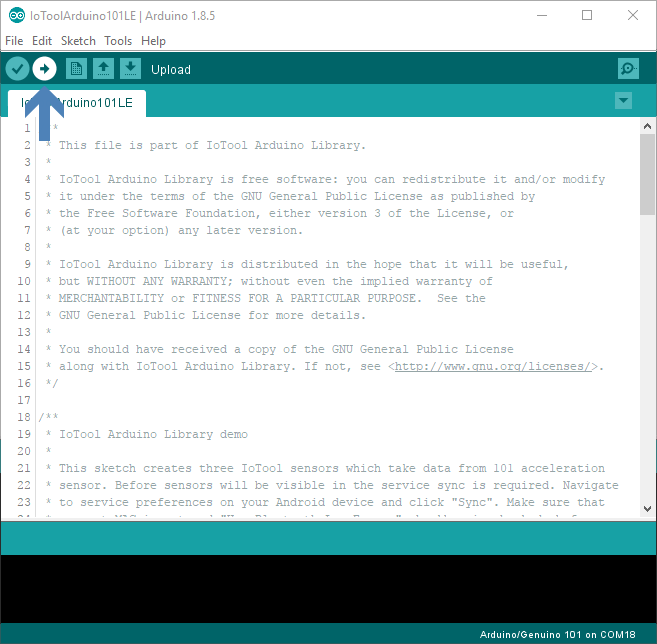
- Press the upload button and wait for the sketch to upload.
Configure and use the IoTool application
- Install the main IoTool application and the IoTool Arduino extension.
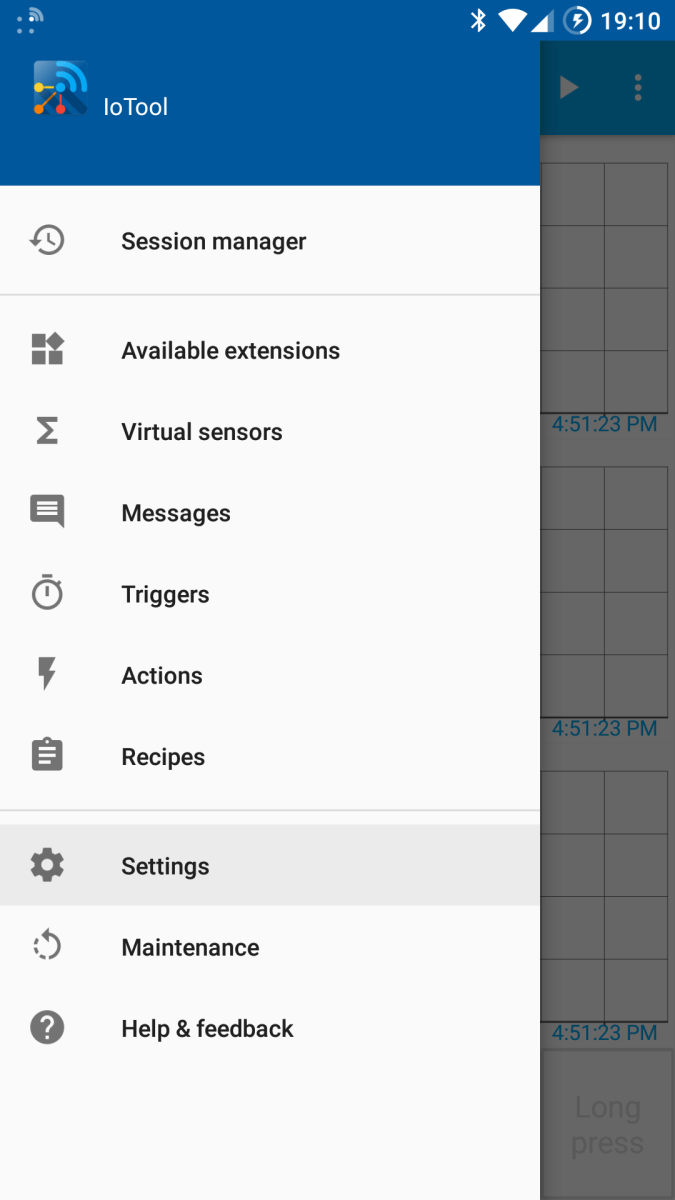
- Launch the IoTool app, open the main drawer, and go to Settings.
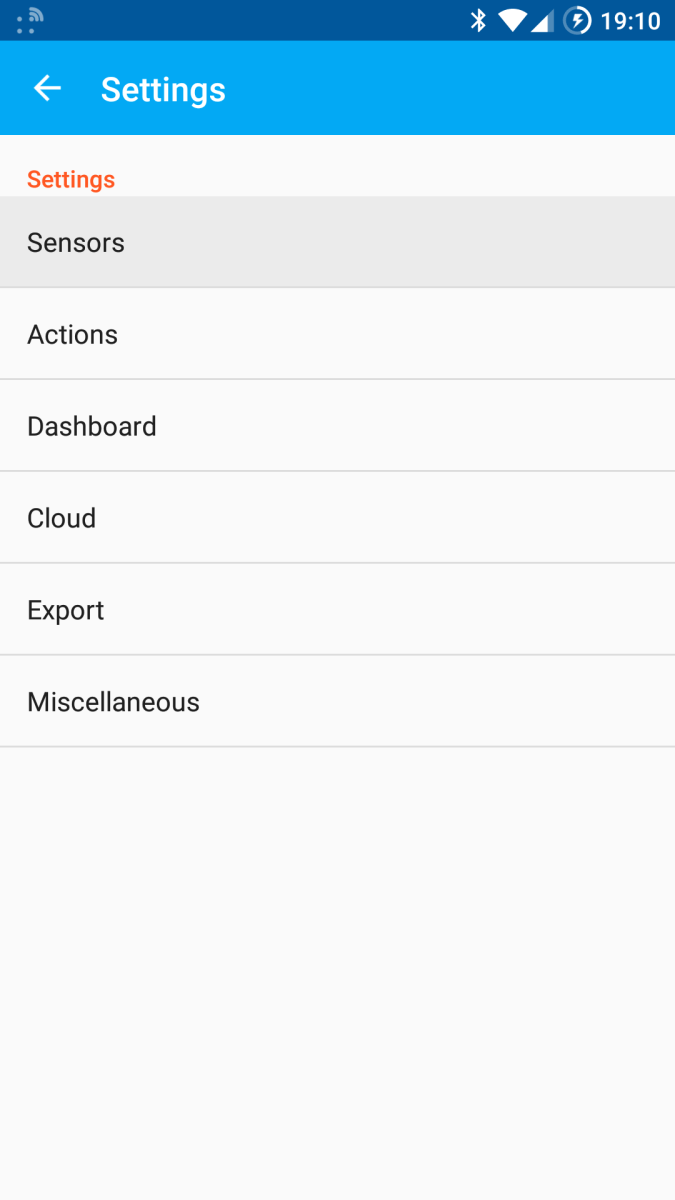
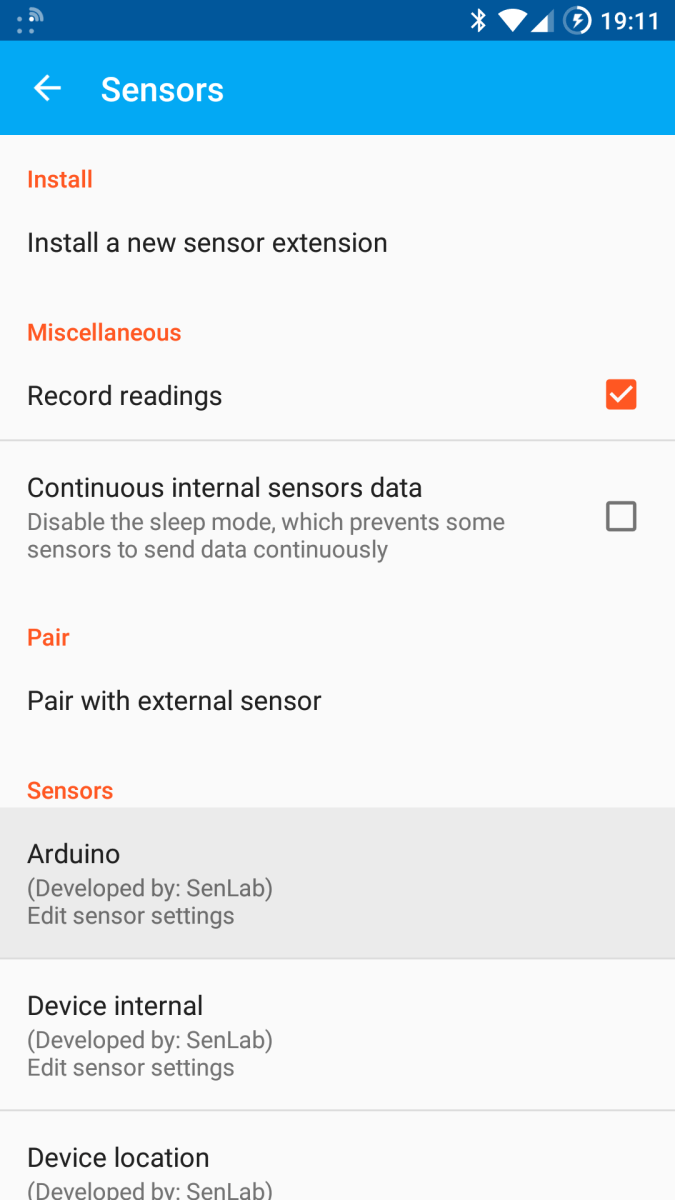
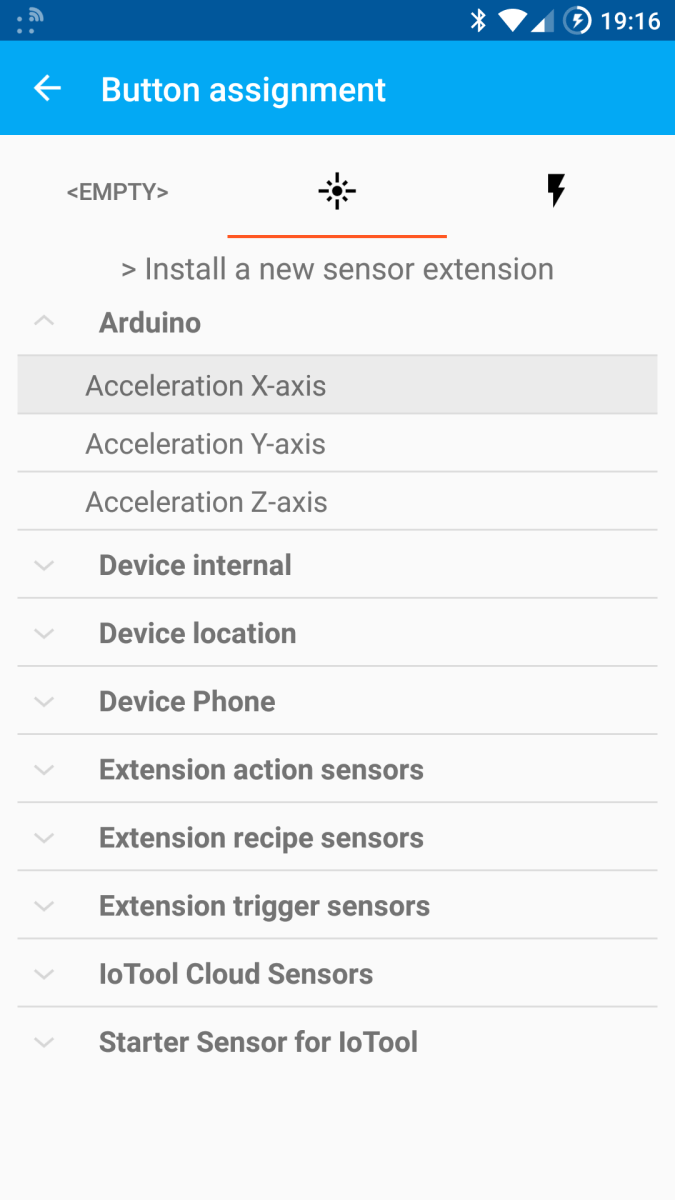
- Click Sensors and find Arduino so you can configure it.
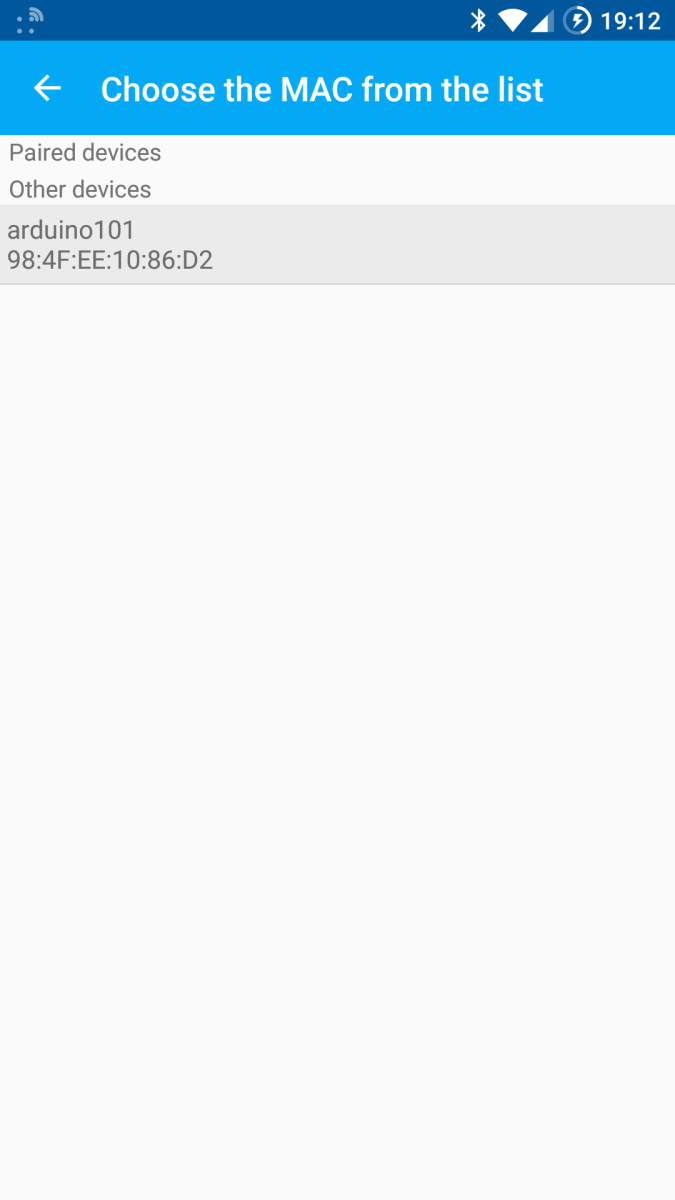
- Select Choose Arduino Bluetooth MAC from the list, click Scan for devices and you should be able to select your Arduino.
- If you are using Arduino/Genuino 101 tick Use Bluetooth Low Energy.
- Click Sync.
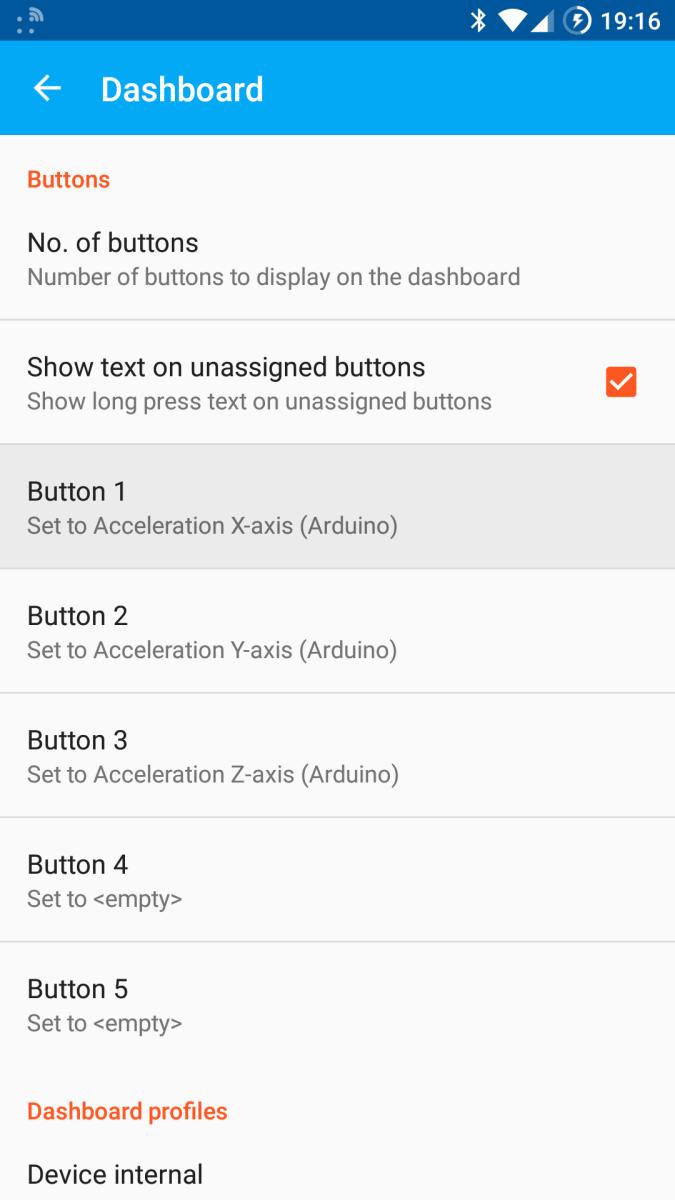
- Go back to Settings and choose Dashboard.
- Set the required number of buttons and select the first one.
- Expand the Arduino submenu and select the desired measurement. Repeat steps 8 and 9 for all buttons and measurements that you wish to read.
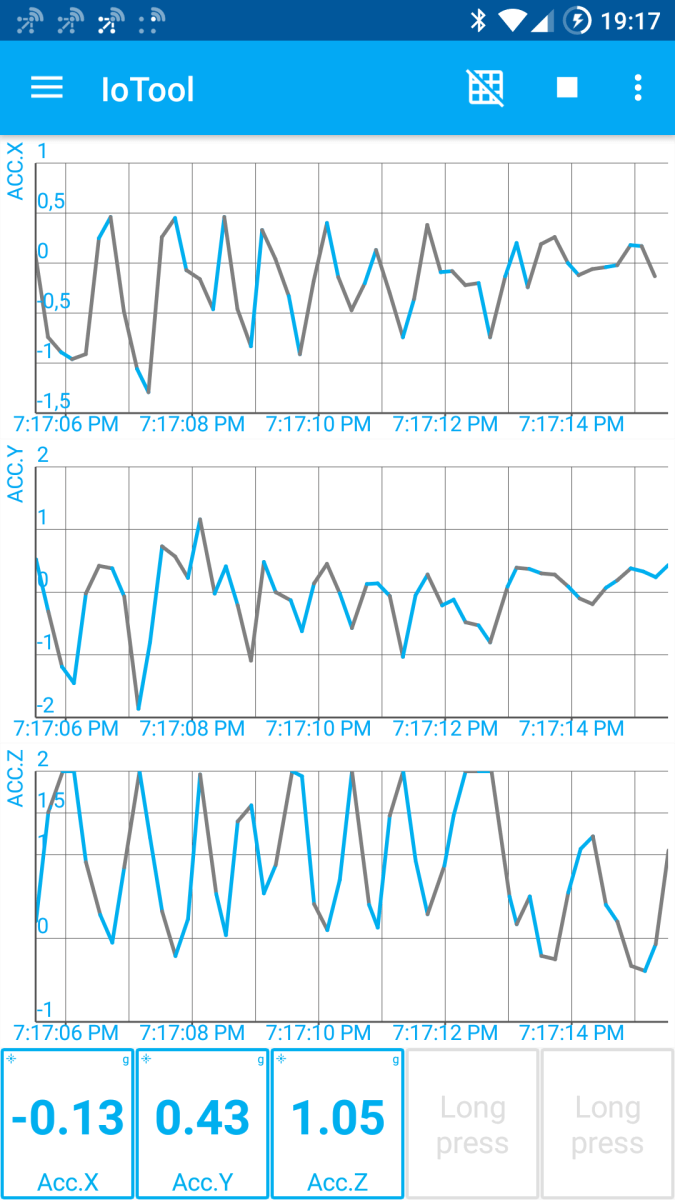
- Go back to the Dashboard and press the start icon in the upper right corner. You should start receiving data from your Arduino.